How to Label Your Toolbox Drawers the Right Way
SpartanShopper · May 7, 2026
Stickers peel. Tape falls off. Marker fades. If you've tried to label your toolbox drawers and given up, the problem wasn't you — it was the method. Here's the system that actually works.
Knowing how to label toolbox drawers properly is one of those things that sounds simple until you've tried three different methods and none of them stick — literally. If you've slapped sticker labels on your drawers only to watch them peel off in a week, or written on masking tape that smeared the first time your hands were greasy, you're not alone.
The good news: there's a right way to do this, and once it's set up it requires zero maintenance. This guide walks you through the best labeling system for toolbox drawers in 2026, how to organize your drawers before you label them, and what to look for in a label that actually holds up in a real shop.
Why Most Toolbox Drawer Labels Fail
Before getting into the solution, it's worth understanding why the common approaches don't work.
Adhesive Stickers
Adhesive stickers are the most common first attempt. They look fine in the package, go on easy, and fail within weeks. The problem is that tool chests live in garages — environments with temperature swings, humidity, oil, and vibration. Adhesive backing degrades in these conditions. Stickers peel at the corners, collect grime underneath, and eventually fall off entirely — usually leaving a sticky residue that's harder to remove than the original label.
Masking Tape and Marker
Cheap and fast, but not a real solution. Tape loosens with temperature changes, marker ink smears on greasy surfaces, and the whole thing looks unprofessional within days. Fine for a temporary label during a project, not for a permanent shop system.
Label Makers
Plastic label maker tape is more durable than masking tape but still adhesive — which means the same peeling and residue problems apply over time. Label makers also require you to type and print every single label, which is slow when you're setting up a full chest.
The Right Solution: Magnetic Labels
Magnetic toolbox labels solve every one of these problems. No adhesive means no peeling, no residue, and no degradation over time. Quality magnetic labels with N52 neodymium magnets hold through drawer slams, vibration, and daily shop use — and reposition freely whenever you reorganize.
Step 1 — Inventory Your Drawers Before You Label Anything
The biggest mistake people make is buying labels before they've organized their tools. Labels don't create organization — they document it. Get the tools sorted first, then label what's there.
Here's a simple inventory process:
- Empty every drawer and group tools by category on a workbench or floor
- Identify your natural categories — don't force a system, let your actual tools tell you what goes together
- Assign one category per drawer where possible — mixed drawers defeat the purpose of labeling
- Note which drawers need labels and which categories you actually have
Common categories for most toolboxes:
- Sockets (SAE, Metric, Deep, Shallow, by drive size)
- Wrenches (combination, open-end, box-end)
- Screwdrivers (flathead, Phillips, specialty)
- Pliers (needle nose, channel lock, wire cutters)
- Ratchets and extensions
- Hex keys / Allen wrenches
- Fasteners (bolts, screws, nuts, washers)
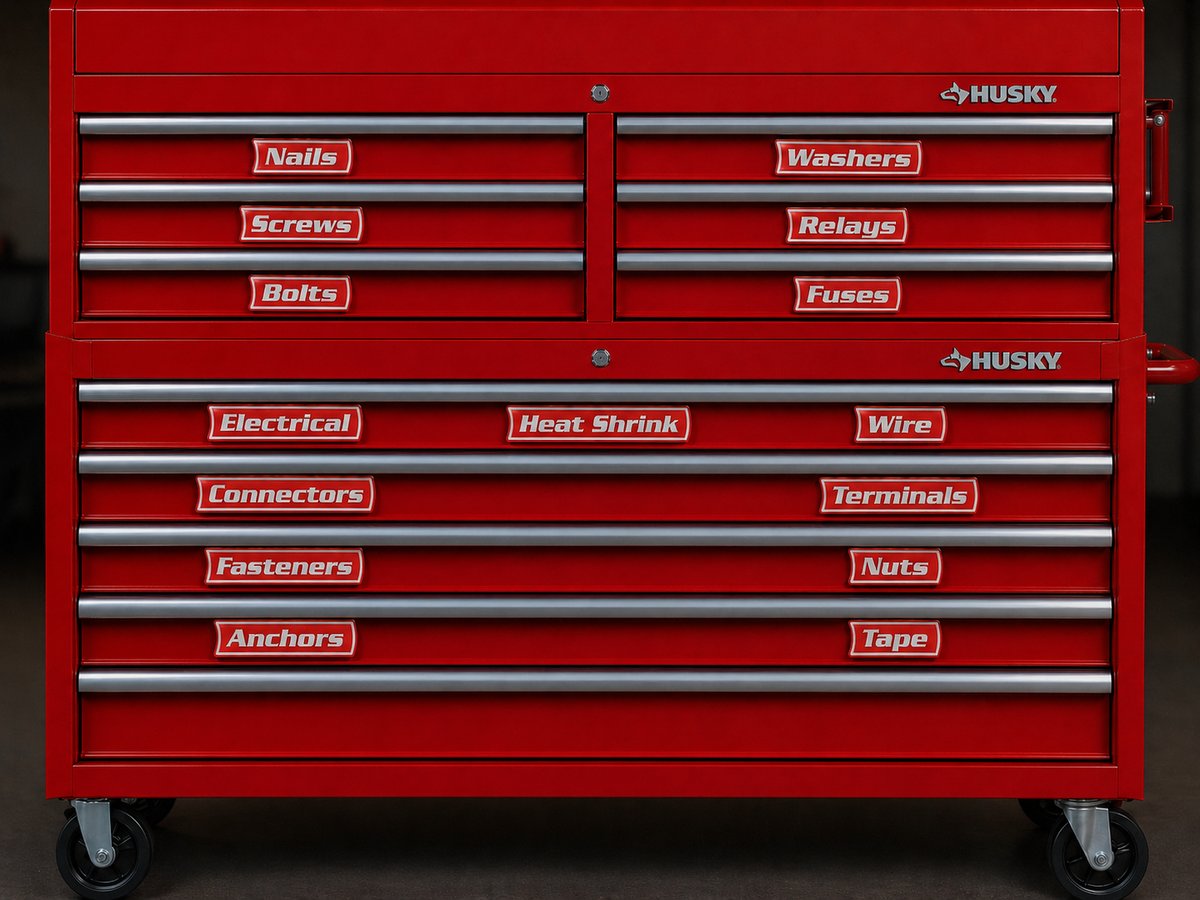
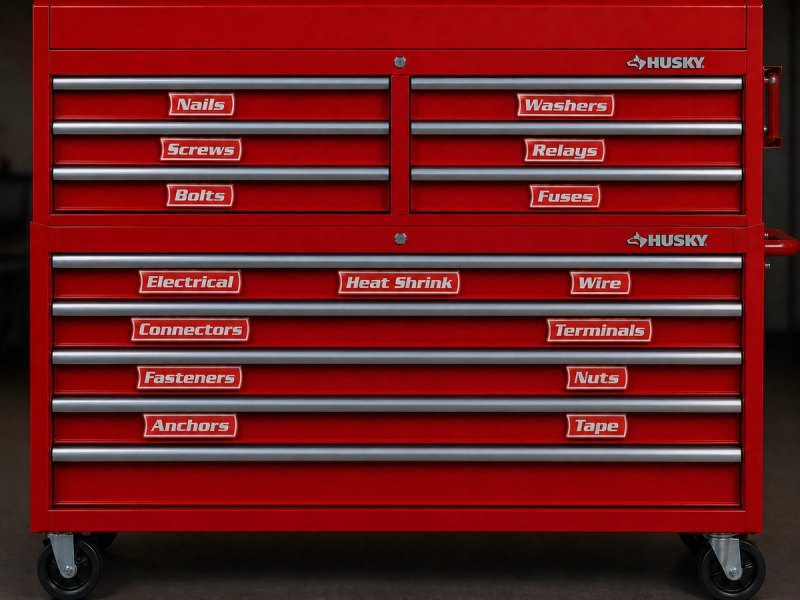
- Electrical (connectors, terminals, wire, heat shrink)
- Measuring tools
- PPE and safety
Step 2 — Choose the Right Magnetic Label Pack
Once you know your categories, match them to a label pack. VoltariTek Labs offers six themed packs designed around real shop workflows — you don't have to figure out the labels yourself, just pick the pack that matches your setup.
| Pack | Labels | Best For | Price |
|---|---|---|---|
| Hazmat & Shop Chemicals | 14 | Chemical storage, safety | $24.99 |
| General Essentials | 15 | Home garage, crossover trades | $24.99 |
| Electrical & Fasteners | 15 | Electricians, builders, DIY | $24.99 |
| Automotive Service & Fluids | 10 | Service and maintenance work | $19.99 |
| Automotive Hand Tools | 12 | Mechanics, serious DIYers | $22.99 |
| Automotive Sockets | 12 | Socket organization by drive/depth | $24.99 |
Most garage setups benefit from at least two packs — the Automotive Hand Tools pack for the main chest and the Automotive Sockets pack for the socket drawers. If you work with electrical or fasteners, add the Electrical & Fasteners pack.
Use code VTEK25 for 25% off at voltaritek.com.
Step 3 — Pick Your Color and Commit to It
VoltariTek labels come in three colors: Workshop Red, Heritage Black, and Cobalt Blue. All three use the same white-on-color typography and N52 magnets — the choice is purely aesthetic.
The rule: pick one color and use it across every pack. Mixing red and black labels on the same chest looks cluttered and defeats the purpose of building a unified system. A single consistent color across all your drawers reads as one organized system rather than a collection of individual labels.
- Red — highest contrast, reads loudest from across the shop. Matches Husky, Snap-On, and Milwaukee tool chests.
- Black — industrial and subtle. Works well on dark cabinets and brushed steel.
- Blue — classic shop palette. Pairs well with Craftsman, Kobalt, and painted blue rigs.
Step 4 — Apply the Labels
Once your drawers are organized and your labels are in hand, the application process takes about 15 minutes for a full chest.
How to apply magnetic toolbox labels:
- Clean the drawer face with a dry cloth — remove any oil or dust from the surface where the label will sit. This isn't required for adhesion (the magnet handles that), but it ensures a clean look.
- Position the label on the drawer face. Center it horizontally, place it at eye level or slightly below for easy reading.
- Press firmly for 2–3 seconds. Exposed N52 magnets snap into contact with the steel — you'll feel the hold immediately. No tools, no tape, no waiting for adhesive to cure.
- Slam the drawer 3–4 times to test. Quality N52 labels don't move. If a label shifts, try repositioning it slightly to find the best steel contact point — some drawer faces have thinner steel at the edges.
- Step back and read from distance. Labels should be readable from 10–15 feet without squinting. If they're not, reposition higher or consider a different color with higher contrast for your shop lighting.
Step 5 — Maintain and Adjust as Your Shop Evolves
One of the biggest advantages of magnetic labels over any adhesive system is that they're permanently adjustable. When you reorganize your tools — and every shop evolves — the labels move with you. No scraping, no residue, no reprinting.
A few tips for long-term maintenance:
- Wipe labels occasionally with a dry cloth to keep them readable in dusty shop environments
- Reposition freely when drawer contents change — magnetic labels slide off and reapply cleanly
- Add custom labels for specialized tools or new categories as your shop grows — VoltariTek offers custom labels at $2.50 each with a 3–5 day turnaround
What Toolboxes Are Compatible?
Magnetic labels work on any ferrous steel surface. If a magnet sticks to it, magnetic labels will hold on it. This covers the vast majority of rolling tool chests and workbench cabinets from:
- Husky — rolling chests, workbench cabinets, side cabinets
- Craftsman — tool chests, rolling cabs, workbench units
- Harbor Freight (US General) — rolling chests and side cabinets
- Snap-On — professional roll carts
- Kobalt, Dewalt, Milwaukee — most rolling storage units
Not compatible: aluminum toolboxes, plastic storage, stainless steel. When in doubt, test with a refrigerator magnet first.
Frequently Asked Questions
How long do magnetic toolbox labels last?
Quality N52 magnetic labels don't have a practical wear-out date for the magnet itself — neodymium magnets retain their strength for decades under normal conditions. VoltariTek backs their labels with a 1-year hold guarantee: if a magnet pops out or a label fails under normal shop use, they replace it.
Can I use magnetic labels on a Husky toolbox?
Yes — Husky rolling chests and cabinets use ferrous steel and are among the most popular toolboxes for magnetic label systems. See our full Husky toolbox label guide for more detail.
Can I make my own magnetic toolbox labels?
You can, but it's more work than it sounds — you need to source N52 magnets, a suitable substrate, and a durable printing method. For most people, a pre-built pack from VoltariTek is faster, cheaper, and produces a more professional result than DIY.
How many packs do I need for a full tool chest?
Most full rolling chests (8–10 drawers) are covered by 2–3 packs depending on your tool categories. Start with the pack that matches your primary work type and add packs as needed.
Do magnetic labels work on modular tool storage like Milwaukee Packout?
Some Packout components use ferrous steel — test with a small magnet before buying. See our full modular tool storage label guide for compatibility details by component.
Final Verdict
Labeling your toolbox drawers the right way means skipping adhesive stickers entirely and going straight to magnetic labels with exposed N52 magnets. Set up your categories first, pick one color, apply the labels in 15 minutes, and you're done — with a system that holds indefinitely and adjusts whenever your shop changes.
For the strongest magnetic toolbox labels made in the USA, VoltariTek Labs is the clear choice. Use code VTEK25 for 25% off your first order.
For the full breakdown of magnetic label types, grades, and compatibility, see our complete guide to magnetic toolbox labels.
Disclosure: SpartanShopper may earn a commission on purchases made through links in this article at no extra cost to you.
Get Exclusive Coupon Codes
Deals and discount codes delivered to your inbox. No spam.
Related Coupons
Alviera
25% Off
Alviera 3-in-1 MagSafe Charging Station — 25% Off
Save 25% at Alviera with this verified Amazon promo code.
Expires: 7/31/2026
Shop Now →
Amazon
50% Off
LQN 15.6" Smart Digital Family Calendar — 50% Off with Code
Save 50% on 15.6" smart digital family calendar WiFi touch from LQN. Apply code at checkout on Amazon.
Expires: 7/5/2026
Shop Now →
Amazon
50% Off
Jeostarky Brother TN760 Toner + DR730 Drum — 50% Off with Code
Save 50% on Brother TN760 toner + DR730 drum 3-pack from Jeostarky. Apply code at checkout on Amazon.
Expires: 6/30/2026
Shop Now →